Anyone who has ever squeezed a classic DIY balloon stress ball knows the inevitable dread: after a few vigorous pinches or an accidental poke from a fingernail, the thin latex membrane tears, unleashing an explosive cloud of white flour, cornstarch, or sticky baking soda across your desk, keyboard, or living room rug. Beyond the mess, standard party balloons pose persistent challenges—latex allergies can cause contact dermatitis, rubber degrades quickly under finger oils, and the sharp elastic snap often provides an abrupt, jarring response rather than soothing sensory relief.
The good news is that you don’t need latex balloons to craft a deeply satisfying, long-lasting tactile fidget. Using common household items like clean socks, kitchen sponges, laminated paper, and cosmetic memory foam, you can construct durable, burst-proof stress balls that provide targeted sensory stimulation without risking a powdery catastrophe.
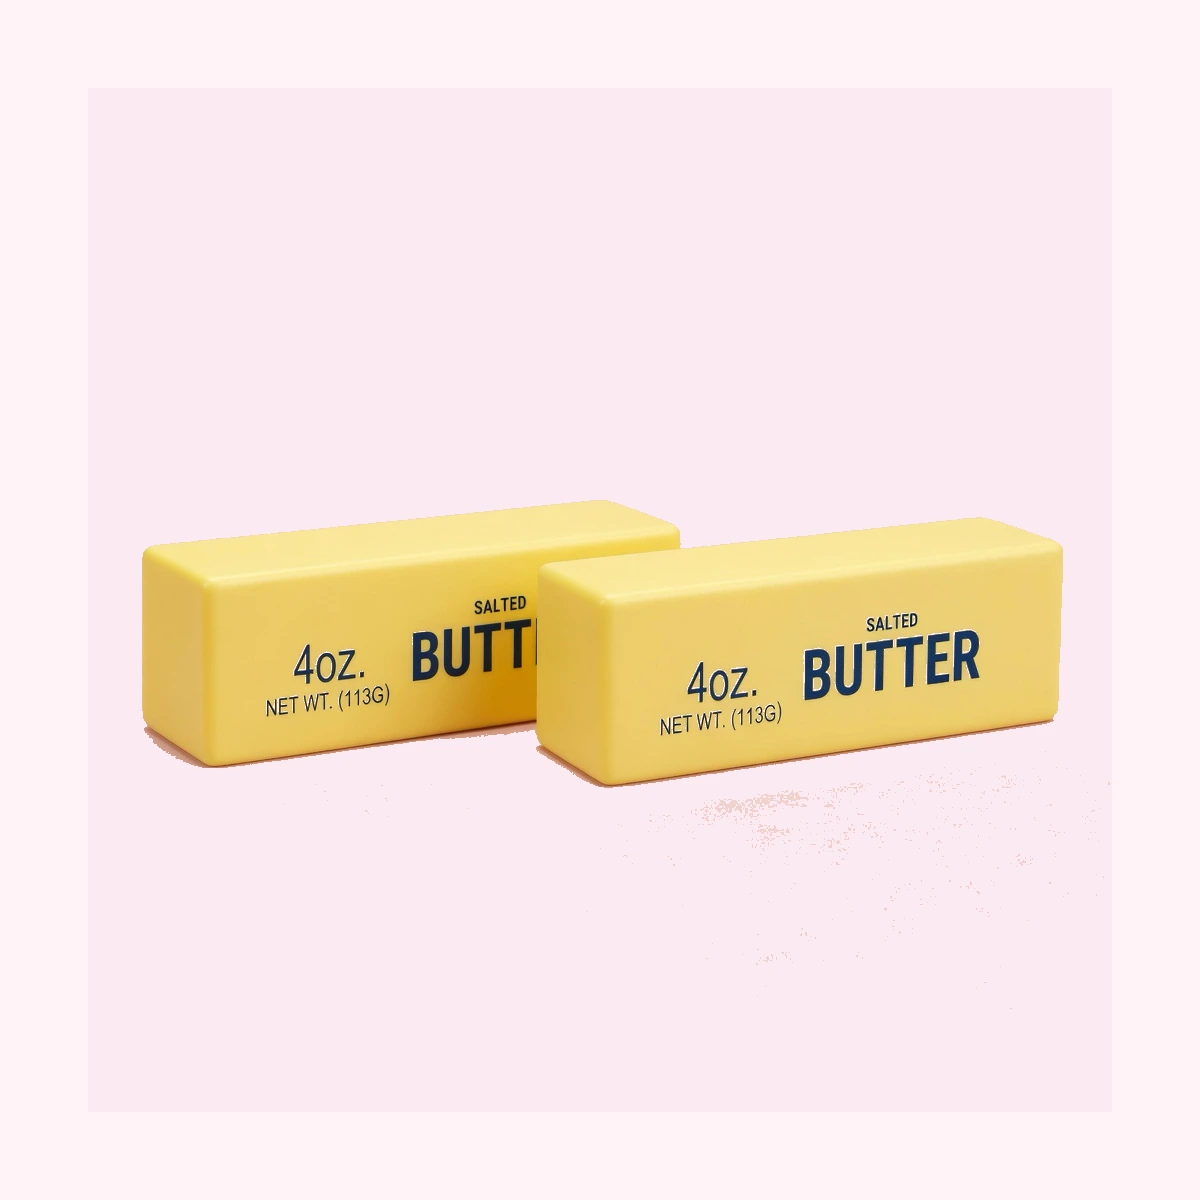
The PU foam butter squishy is a soft, slow-rising stick-of-butter squishy toy made from dense premium foam with an approximate supplier reference weight of 45 g, delivering a pillowy buttery drag on every squeeze.
Whether you are looking for an engaging weekend sensory craft, a quiet classroom tool for students, or a resilient desk toy to ease workplace anxiety, this guide walks you through four tested, mess-free DIY methods—and explains when precision-engineered polyurethane (PU) foam squishies offer an unbeatable upgrade.
At-a-Glance Comparison: DIY Balloon-Free Methods vs. Factory PU Foam
Before gathering your crafting supplies, compare the tactile response, durability, and construction effort of each homemade approach against factory-molded slow-rising foam:
| Construction Method | Core Filling | Outer Casing | Tactile Feedback | Mess & Pop Risk | Lifespan | Best Use Case |
|---|---|---|---|---|---|---|
| Method 1: Clean Sock Fidget | Dry rice, lentils, or sealed flour | Double-folded cotton sock | Dense, malleable, beanbag heft | Zero burst risk; minimal spill | 6–12 Months | Deep grounding pressure; desk fidgeting |
| Method 2: Double-Sponge Ball | High-density cellulose sponge | Breathable fabric sleeve | Lightweight, springy, quick snap | Completely dry and mess-free | 3–6 Months | Active hand exercise; grip strengthening |
| Method 3: 3D Paper Squishy | Micro-vented polyfill stuffing | Laminated clear-tape paper net | Crisp crinkle, gentle slow return | Tearable if crushed violently | 2–4 Months | Creative art projects; visual desk novelty |
| Method 4: Cosmetic Foam Wrap | Teardrop makeup sponges | Elastic spandex/lycra wrap | Silky, dense, compact give | Mess-free; no loose powders | 6–9 Months | Subtle one-handed pocket fidgeting |
| Commercial Benchmark (PU Foam) | Cast viscoelastic polyurethane | Seamless integrated skin | Ultra slow-rising, buttery drag | 100% burst-proof; waterproof | Multi-year | Silent office relief; heavy daily decompression |
Method 1: The Clean Sock Stress Ball (The Most Durable DIY Method)
If your primary goal is a heavy, substantial hand feel that conforms under firm squeezing without ever popping, an athletic crew sock filled with dry pantry staples is the undisputed champion of balloon-free crafts.
Required Materials
- 1 clean, tightly woven crew sock (cotton, polyester, or bamboo blend)
- 1 to 1.5 cups of dry white rice, dried green lentils, or sealed cornstarch
- 1 wide-mouth funnel (or an empty plastic bottle with the top cut off)
- 1 small rubber band or zip tie (for internal safety binding)
- Heavy-duty sewing needle and thread (or strong fabric glue)
+-------------------------------------------------------------------------+
|                  THE DOUBLE-FOLD SOCK STRESS BALL METHOD                |
+-------------------------------------------------------------------------+
| 1. FILL TOE         2. TIE INNER NECK    3. INVERT CUFF     4. SEW CUFF |
| Funnel 1-1.5 cups   Secure tight band    Fold remaining     Blind-stitch|
| of dry rice/lentil  above granular mass  cuff over ball     outer edge  |
+-------------------------------------------------------------------------+
Step-by-Step Instructions
Step 1: Funnel the Filling Into the Toe
Stretch the sock opening over the wide end of your funnel. Pour in 1 cup of dry rice or lentils. Shake the sock gently so the grains settle snugly into the toe box, forming a compact, grapefruit-sized sphere. Avoid overfilling; leaving a small amount of internal give ensures the grains can shift fluidly when squeezed.
Step 2: Cinch the Inner Core
Twist the sock neck tightly directly above the grain mass. Wrap a heavy rubber band or zip tie around the twist 4 to 5 times. Trim any excess plastic zip-tie tail flush to prevent sharp edges.
Step 3: The Double-Layer Inversion Hack
This crucial step guarantees zero spills: take the remaining long cuff of the sock, stretch it wide, and pull it completely back over the grain-filled toe. Twist once more and fold the cuff over a second time. This creates two to three thick layers of durable textile barrier protecting against seam stress.
Step 4: Stitch or Glue the Opening
Tuck the open sock cuff inward and use a needle and thread to apply a simple whip stitch or ladder stitch along the seam. Alternatively, run a generous line of flexible fabric glue along the seam and clamp for 30 minutes until dry.
- Tactile Experience: Delivers a dense, satisfying dough-like weight that relaxes hand muscles and calms nervous tension.
Method 2: The Double-Sponge Squishy Stress Ball
When you want an airy, springy squeeze rather than heavy beanbag weight, repurposed kitchen or car-wash sponges provide an outstanding cellular core that instantly springs back into shape.
Required Materials
- 2 new cellulose kitchen sponges (without abrasive scouring pads) or 1 car-wash sponge
- Heavy fabric shears or craft scissors
- 1 strip of stretchy jersey cotton or tubular sock sleeve
- Flexible fabric glue or hot glue gun
Step-by-Step Instructions
Step 1: Shape the Sponge Core
If using sponges with green scouring pads, peel the scratchy pad off cleanly. Place the two sponges together. Using sharp shears, round off the four corners and chamfer the edges until you have a smooth, palm-filling oval.
Step 2: Stack and Bind
Apply a thin layer of fabric glue between the two sponge layers and press them firmly together for 5 minutes. The glue line creates a central hinge that resists shearing forces when twisted.
Step 3: Encasing the Sponge
Slide the contoured sponge core into a cut section of a soft cotton sock or wrap it in a rectangle of jersey fabric. Pull the fabric taut so the sponge is lightly pre-compressed.
Step 4: Final Enclosure
Tie off both ends of the fabric sleeve like a candy wrapper, trim the excess fringes, and tuck the knots inside. You now have a buoyant, springy stress ball that cannot leak, spill, or stain your desk.
- Tactile Experience: Feather-light in the palm with an energetic, rapid rebound ideal for stimulating circulation during long typing sessions.
Method 3: The 3D Tape & Paper Squishy Ball
Paper squishies have taken the sensory craft community by storm. While flat paper squishies can feel flimsy, constructing a freestanding 3D paper sphere stuffed with polyester fiberfill delivers an addictive crinkle-and-rise action.
Required Materials
- 2 sheets of heavy white paper (90–120 gsm) or cardstock
- Colored markers, pencils, or gel pens
- Wide clear packing tape (2-inch width, heavy-duty)
- High-resilience polyester fiberfill (stuffing from craft stores or clean pillow batting)
- Sewing pin or needle (for micro-perforation)
Step-by-Step Instructions
Step 1: Design and Cut the Net
Draw or print a 6-panel spherical net or two mirrored circle bowls with small side darts. Decorate your design with vibrant colors, kawaii faces, or relaxing pastel gradients.
Step 2: Complete Surface Lamination
Cover both the front and back of the paper completely with overlapping strips of clear packing tape. The tape acts as an impermeable synthetic skin, making the paper waterproof, tear-resistant, and flexible.
Step 3: Assembly and Seaming
Cut out the laminated shape. Fold the curved darts together and tape each seam securely from the outside. Leave a small 1-inch opening at the base.
Step 4: Stuffing and Micro-Venting
Stuff handfuls of polyester fiberfill into the opening, pressing the stuffing outward so the ball maintains a plump, rounded shape. Tape the opening completely shut. Finally, use a fine sewing pin to poke 2 or 3 tiny micro-holes near a taped seam.
- Tactile Experience: Squeezing forces air out through the microscopic pinholes with a gentle crinkling sensation; releasing the ball allows the resilient polyfill to expand slowly as air is drawn back inside, perfectly mimicking slow-rising foam.
Method 4: The Cosmetic Foam & Lycra Fabric Pouch Hack
For a discreet, ultra-smooth desk fidget that fits unobtrusively into an office pocket, grouping high-density cosmetic blending sponges inside a soft spandex pouch yields exceptional tactile luxury.
Required Materials
- 3 to 4 dense teardrop makeup blender sponges (latex-free polyurethane foam)
- 1 square piece of lycra or spandex fabric (8 x 8 inches)
- Elastic cord or durable nylon thread
Step-by-Step Instructions
- Cluster the Sponges: Arrange three or four blending sponges in a tight cloverleaf formation with their rounded bases pointing outward.
- Wrap in Stretch Textile: Center the sponge cluster on your lycra fabric square. Pull the four corners upward, gathering the fabric tightly over the foam so the sponges compress into a single cohesive round ball.
- Bind the Neck: Wrap elastic cord tightly around the gathered neck at least 5 times. Knot securely and trim the frayed fabric ends into a neat pom-pom tassel.
- Usage: The dense, microscopic cell structure of cosmetic sponges offers zero resistance to full-finger squeezes while returning to shape with smooth, silent fluidity.
DIY vs. Factory PU Foam: Why FunnySquishy’s Butter Squishies & Bricks Excel
Crafting homemade stress balls provides immense creative joy, cost savings, and customizability. However, homemade builds inevitably show their physical limits after weeks of heavy, repetitive stress:
- Socks accumulate lint and skin oils that require frequent machine washing.
- Sponge cores develop internal shear tears under heavy torque.
- Paper tape seams eventually split under aggressive palm pressure.
When you need an industrial-grade sensory companion for marathon work hours, severe anxiety relief, or quiet executive fidgeting, precision-molded polyurethane (PU) memory foam squishies represent the gold standard of tactile engineering. Unlike DIY assemblies, factory PU foam features a molded, seamless outer skin that encapsulates microscopic closed-cell pneumatic chambers. This produces an unhurried, buttery drag that takes several seconds to slowly bloom back to life.
FunnySquishy specializes in high-density, slow-rising PU foam designs engineered specifically for deep compression without ever tearing or leaking. Below are four benchmark models that illustrate why factory foam remains unmatched:
1. PU Foam Butter Squishy — That Buttery Slow Squeeze (FS-BUTTER-005)
- Design & Feel: Molded to resemble an authentic fresh stick of butter, this piece provides an ultra-dense, satisfying hand squeeze.
- Tactile Profile: The PU foam butter squishy is a soft, slow-rising stick-of-butter squishy toy made from dense premium foam with an approximate supplier reference weight of 45 g, delivering a pillowy buttery drag on every squeeze.
- Why It Beats DIY: Home sponges bounce back in less than half a second. The FS-BUTTER-005 delivers a leisurely 6- to 10-second slow rise that creates an unhurried, meditative rhythm for busy desks.
- Reference: PU Foam Butter Squishy
2. 2 Pack Butter Squishy — Keep One, Gift the Other (FS-BUTTER-011)
- Design & Feel: A matching pair of palm-sized butter stick squishies, perfect for dual-hand stress relief or sharing with a coworker.
- Tactile Profile: Features soft, velvety foam skin that squishes flat under a gentle press, then reshapes at a slow, calming pace without mess or residue.
- Why It Beats DIY: Arrives as a perfectly matched set without messy flour funnels or loose sewing seams. Keep one at your work terminal and stash the second in your commute bag.
- Reference: 2 Pack Butter Squishy
3. 3 Pack Butter Squishy — One to Keep, Two to Share (FS-BUTTER-007)
- Design & Feel: A generous trio of butter sticks designed for multi-room placement and classroom sensory rewards.
- Tactile Profile: Offers consistent, pillowy compression across all three pieces. Squeezing each stick provides a gentle, unhurried rebound that redirects nervous fidgeting into quiet, focused calm.
- Why It Beats DIY: Hand-making three matching stress balls takes hours of measuring, sewing, and cleanup. The FS-BUTTER-007 provides durable, uniform sensory tools ready for instant use.
4. Blue Butter Brick Squishy 2 Pack — Squeezy Stress Relief Block (FS-BRICK-P006)
- Design & Feel: An oversized, ergonomic blue foam block engineered for heavy two-handed squeezing and twisting.
- Tactile Profile: Cool blue and deeply squishable. This brick squishy takes a full-hand squeeze and folds flat, then rises back on its own drawn-out slow schedule.
- Why It Beats DIY: Delicate sock and sponge crafts cannot withstand aggressive, full-palm twisting. The high-density polymer structure of the FS-BRICK-P006 absorbs maximum grip force and springs back cleanly every time.
- Reference: Blue Butter Brick Squishy 2 Pack
Frequently Asked Questions (FAQ)
What can you use instead of balloons to make a stress ball?
You can use a wide variety of household items instead of balloons, including clean athletic socks, cellulose kitchen sponges, laminated paper taped into 3D shapes, and teardrop cosmetic blending foam. For fillings, dry rice, dried lentils, plastic pellets, and polyester batting provide safe, mess-free tactile mass without any bursting hazards.
How do you make a stress ball that doesn’t burst or leak powder?
To guarantee zero bursting, avoid using loose fine powders like unsealed baking soda or loose flour. Instead, use granular pantry items (such as rice or lentils) sealed inside a double-folded sock, or choose solid foam cores like cut sponges and polyfill batting. Solid fillings cannot explode, spill, or puff dust when compressed with heavy force.
How does a factory PU foam butter squishy compare to a DIY sock stress ball?
A DIY sock stress ball offers heavy, malleable beanbag heft that holds indented shapes until kneaded, but it lacks elastic memory. In contrast, factory PU foam butter squishies feature viscoelastic memory cells that mold effortlessly under fingers, followed by an automatic, slow-rising buttery bloom. PU foam is completely silent, uniform, and permanently resilient.
Can you wash DIY sock or sponge stress balls?
Sock stress balls filled with rice, beans, or lentils must NEVER be submerged in water, as organic fillings will absorb moisture, swell, and develop mold. Sponge-based stress balls with removable textile covers can be hand-washed in lukewarm water with mild detergent and air-dried thoroughly before reassembly.
Why do balloon stress balls always break?
Traditional latex party balloons are designed to hold low-pressure air, not concentrated hydraulic pressure from human fingers. Repeated pinching creates localized shear friction that thins the latex wall, especially along seam lines, inevitably leading to sudden tears and explosive powdery spills.